|
| August 3, 2006 |
 |
|
 |
|
|
| September 12, 2005 |
| This palmcast is 5 minutes and 55 seconds long. It discusses a great example of an open source application in the Palm community called CryptoPad. |
|
| Discuss | Archives |
 |
|
|
Perform a ROM Update
Updated: January 19, 2006 1:11 pm
 I have successfully updated many devices. My latest experience has been with my Treo 650 using the latest update from PalmOne, Treo 650 Updater 1.13 for Unlocked GSM. I thought I would share my process for performing the ROM update. Please note that I use a conservative approach. While at times it seems more trouble than it is worth, it has saved me a lot of headaches. Even though this user guide focuses on the update to my Treo 650 using a Windows computer, I have adapted this user guide for other updates as well. I have successfully updated many devices. My latest experience has been with my Treo 650 using the latest update from PalmOne, Treo 650 Updater 1.13 for Unlocked GSM. I thought I would share my process for performing the ROM update. Please note that I use a conservative approach. While at times it seems more trouble than it is worth, it has saved me a lot of headaches. Even though this user guide focuses on the update to my Treo 650 using a Windows computer, I have adapted this user guide for other updates as well.
Note: Since I do not have a Tungsten C or a Mac computer, I would be grateful for screenshots that I could use to enhance this guide. If there is anyone willing to help, please let me know by using the contact link at the top of the page. Thank you.
Disclaimer: This user guide is provided as a supplement to help users perform ROM updates on their particular device. While you could use this as a standalone guide, please use this guide along with the detailed instructions from the vendor for each update. Here are the list of updates supported by this user guide:
- Backup Your Device
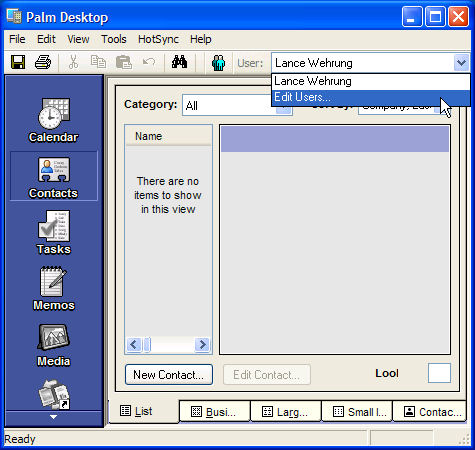
For most users, this can be accomplished by simply performing a HotSync. For me, this has always worked well. You might feel more comfortable with a dedicated backup solution. Even if you use a backup application, you still will want to HotSync. After you HotSync, record your permanent user name. This will be the name in the upper right of the screen right after you HotSync. Mine is Lance Wehrung in the screen shot below. In Step G, you will need this user name.

Important Note for Tungsten T5 Users: Be sure to backup the contents of the Internal Drive of the device. This will involve copying all the data to your desktop computer using the File Transfer Utility. This will have to be done manually, and it depends on your computer type.
For Windows Users:
- Attach your handheld to your computer.
- Turn on the handheld.
- On your computer, launch the File Transfer application.
- Right-click on the folder named Internal and then select Save to PC. Save to your Desktop. Note: If you renamed your Internal Drive, right-click on the icon that represents your Internal Drive instead.
For Mac Users:
- Disconnect your handheld from your Mac.
- Launch Drive Mode on your handheld.
- Connect your handheld to your Mac.
- Create a new folder on your Mac desktop.
- Copy the contents of the Internal Drive to the folder.
- Disconnect from Drive Mode.
Important Note for Tungsten C Users: Ensure that your Tungsten C handheld has the same MAC address as the one located on the rear of the unit by following these steps:
- From the Launcher on your Tungsten C select 'Prefs'.
- From the 'Prefs' Panel choose 'Wi-Fi'.
- Select 'Info' from the bottom of the Wi-Fi screen.
- Next to MAC Address there is a 12 character ID, This should match the number on the rear of your device.
- If the MAC Address does NOT match the MAC label on the rear of the handheld, contact palmOne Customer Support. Do NOT continue the upgrade.
- Setup New User
Here, I setup a new user to synchronize my device for the specific purpose of installing the update provided by PalmOne. This insures that nothing affects your current user setup. In addition, I make sure almost all the conduits for the new user are set to "Do Nothing" by default. There are four conduits I always keep set as follows:
- Quick Install -> Synchronize the Files.
- Install -> Enabled
- Install to Card -> Enabled
- Backup -> Handheld overwrites Desktop
Here are some more details about setting up a new user...
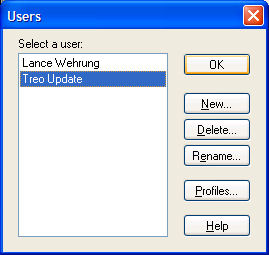
- Run the Palm Desktop software and Edit Users.
- Click on New.
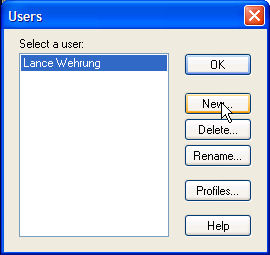
- Enter New User Name
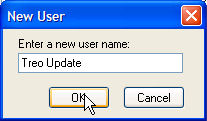
- Click OK twice and exit the Palm Desktop software.
Here are some more details about setting up the conduits for the new user...
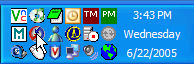
- Look for HotSync icon in your taskbar and click on it
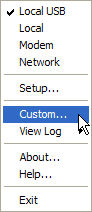
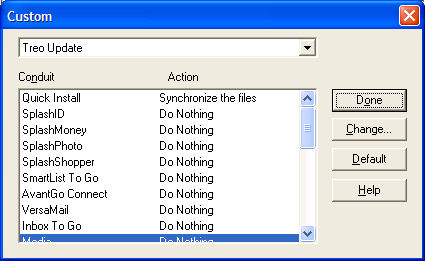
- From the menu, select Custom...
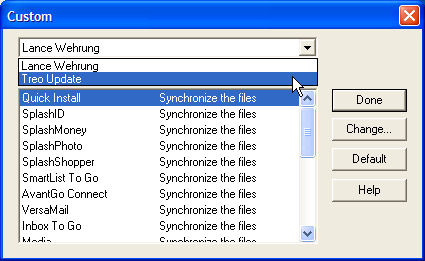
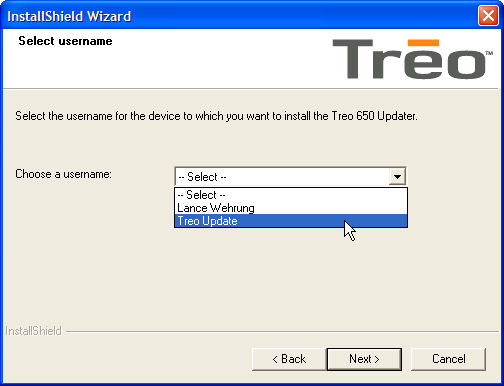
- Select new user you created, which is Treo Update in my example.
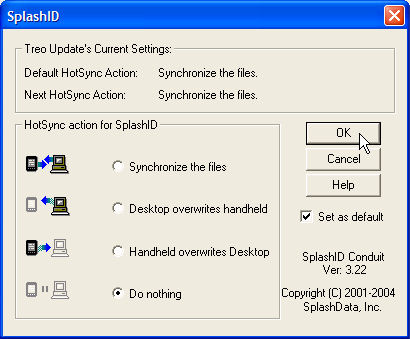
- Select conduit and click on Change.
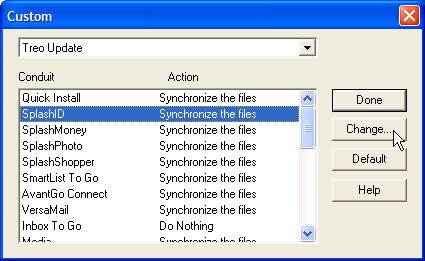
- Select Do nothing and Set as default and click on OK.
- Repeat steps 4 and 5 for all conduits except for these four conduits that I always keep set as follows:
- Quick Install -> Synchronize the Files.
- Install -> Enabled
- Install to Card -> Enabled
- Backup -> Handheld overwrites Desktop
- When finished with steps 4 - 6, click on Done to finish.
- Remove External Memory Cards
It is always better safe than sorry, so remove the external memory card from your device.
- Perform a Hard Reset
This will erase everything on your device. Be sure you backed up your device as discussed in Step A. To perform a hard reset:
- Treo 650 Users Only: Press the Battery Door Release button and slide the battery door downward to remove it from your Treo. Do not remove the battery.
- Take out the stylus and have it ready.
- Hold down the Power/End button.
- While still holding the Power/End button, use the stylus to gently press the RESET hole on the back. For Tungsten T5 users, you will have to use the top of the stylus, which unscrews, in order to press the RESET hole on the back of the device.
- You will see palmOne logo and a progress bar first, then a circular Palm Powered logo. Do not release the Power/End button until the second, circular Palm Powered logo appears (gray background). For Tungsten C users, you will only see the circular Palm Powered logo screen appear.
- After you release the Power/End button, follow the on-screen directions to delete all data (press "up" button on the device).
- The device will ask you several questions to initially setup your device. Do this now.
- HotSync with New User Name
After performing a hard reset, HotSync the device. You will be prompted to synchronize with existing user or to create a new one. Select an existing user, and make sure the new user you setup is selected. For my example, my new user name is Treo Update.
- Download and Install ROM Update
You will need to download and install the update from PalmOne. Refer to the links to the updates at the beginning of this guide in order to download and to install the files. After you download the update, There are typically two scenerios here.
For Windows users (except for Tungsten C Users):
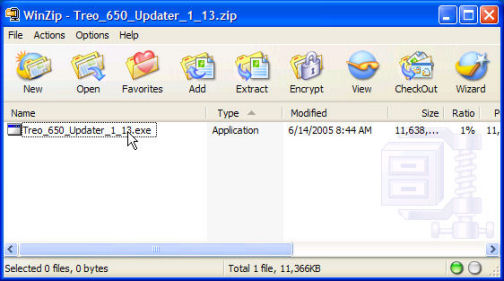
- Open the ZIP file.
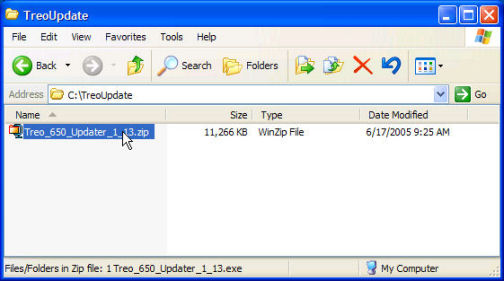
- Open the setup file in the ZIP file. Note: I am using WinZip in my example.
- Follow the on-screen directions. Remember to install the update files to the new user setup in Step B.
For Mac users and Tungsten C users:
- Open the SIT (Mac) or ZIP (Windows) file.
- Extract the contents of the SIT or ZIP file to a folder on your computer.
- Install all the file(s) in the folder to your handheld. Remember to install the update files to the new user setup in Step B.
Important Note for Tungsten C Users: You have to manually launch the update on the device. Before you launch the update, you need to turn on Wi-Fi. To do this: go to the 'Prefs' Panel, choose 'Wi-Fi', and turn Wi-Fi "On".
- Restore Your Device
After the update hard resets your device, you will want to HotSync your device with your permanent user, not the new user we setup for the update (see Step A). If you used a backup application, please refer to the documentation when restoring your device.
Important Note for Tungsten T5 Users: To restore the contents of your Internal Drive, you will have to do this manually. It depends on your computer type.
For Windows Users:
- On your PC, open the File Transfer application.
- In File Transfer, in the left pane click the folder named Internal. Note: If you renamed your Internal Drive, click on its name in the left pane.
- On your Desktop, double-click to open the Internal folder that you created in Step A when you backed up your Internal Drive contents.
- Drag and drop the contents of this folder to the right pane of the File Transfer window. When the "Confirm File Replace" dialog displays, click "Yes to All."
For Mac Users:
- Disconnect your handheld from your Mac.
- Launch Drive Mode on your handheld.
- Connect your handheld to your Mac.
- On your Mac, navigate to the folder where you backed up your Internal Drive in Step A.
- Drag the files to your Internal Drive.
- Disconnect from Drive Mode.
You will want to be sure you upgrade to the latest version of Documents To Go on your desktop as it updates the version of Documents To Go on your device.
|
|